Cue Editing
Adding Assets to a Cue
Open the Asset Manager and drag assets into your cue's asset list. That's your starting point — the cue now knows which media to use.
Each asset in the cue inherits its default settings from the Asset Manager. Want a different position, size, or opacity just for this cue? Override it right in the cue's asset properties — the defaults stay untouched for everywhere else.
Open Monitors — Arrange on Screen
To actually see and arrange your assets visually, click Open Monitors. This opens the canvas for your output monitors, and now you can drag assets around, resize them, and get everything looking just right — live on screen. It's much more fun than punching in coordinates.
When the monitors are open, you also get a few extra controls:
- Fade In / Fade Out buttons — Try out how your cue will appear and disappear. Great for dialing in smooth transitions.
- Edit / Play toggle — Switch between editing the cue and previewing how the assets will actually play. This is just for this cue, just to see how it looks in action.
- Black button — Instantly hides all content, just like blackout in Show Mode. Handy for checking what a clean cut looks like.
Cue Settings
Now for the really interesting part. Each cue has settings that control how it behaves during the show — and the most powerful one is the stop mode.
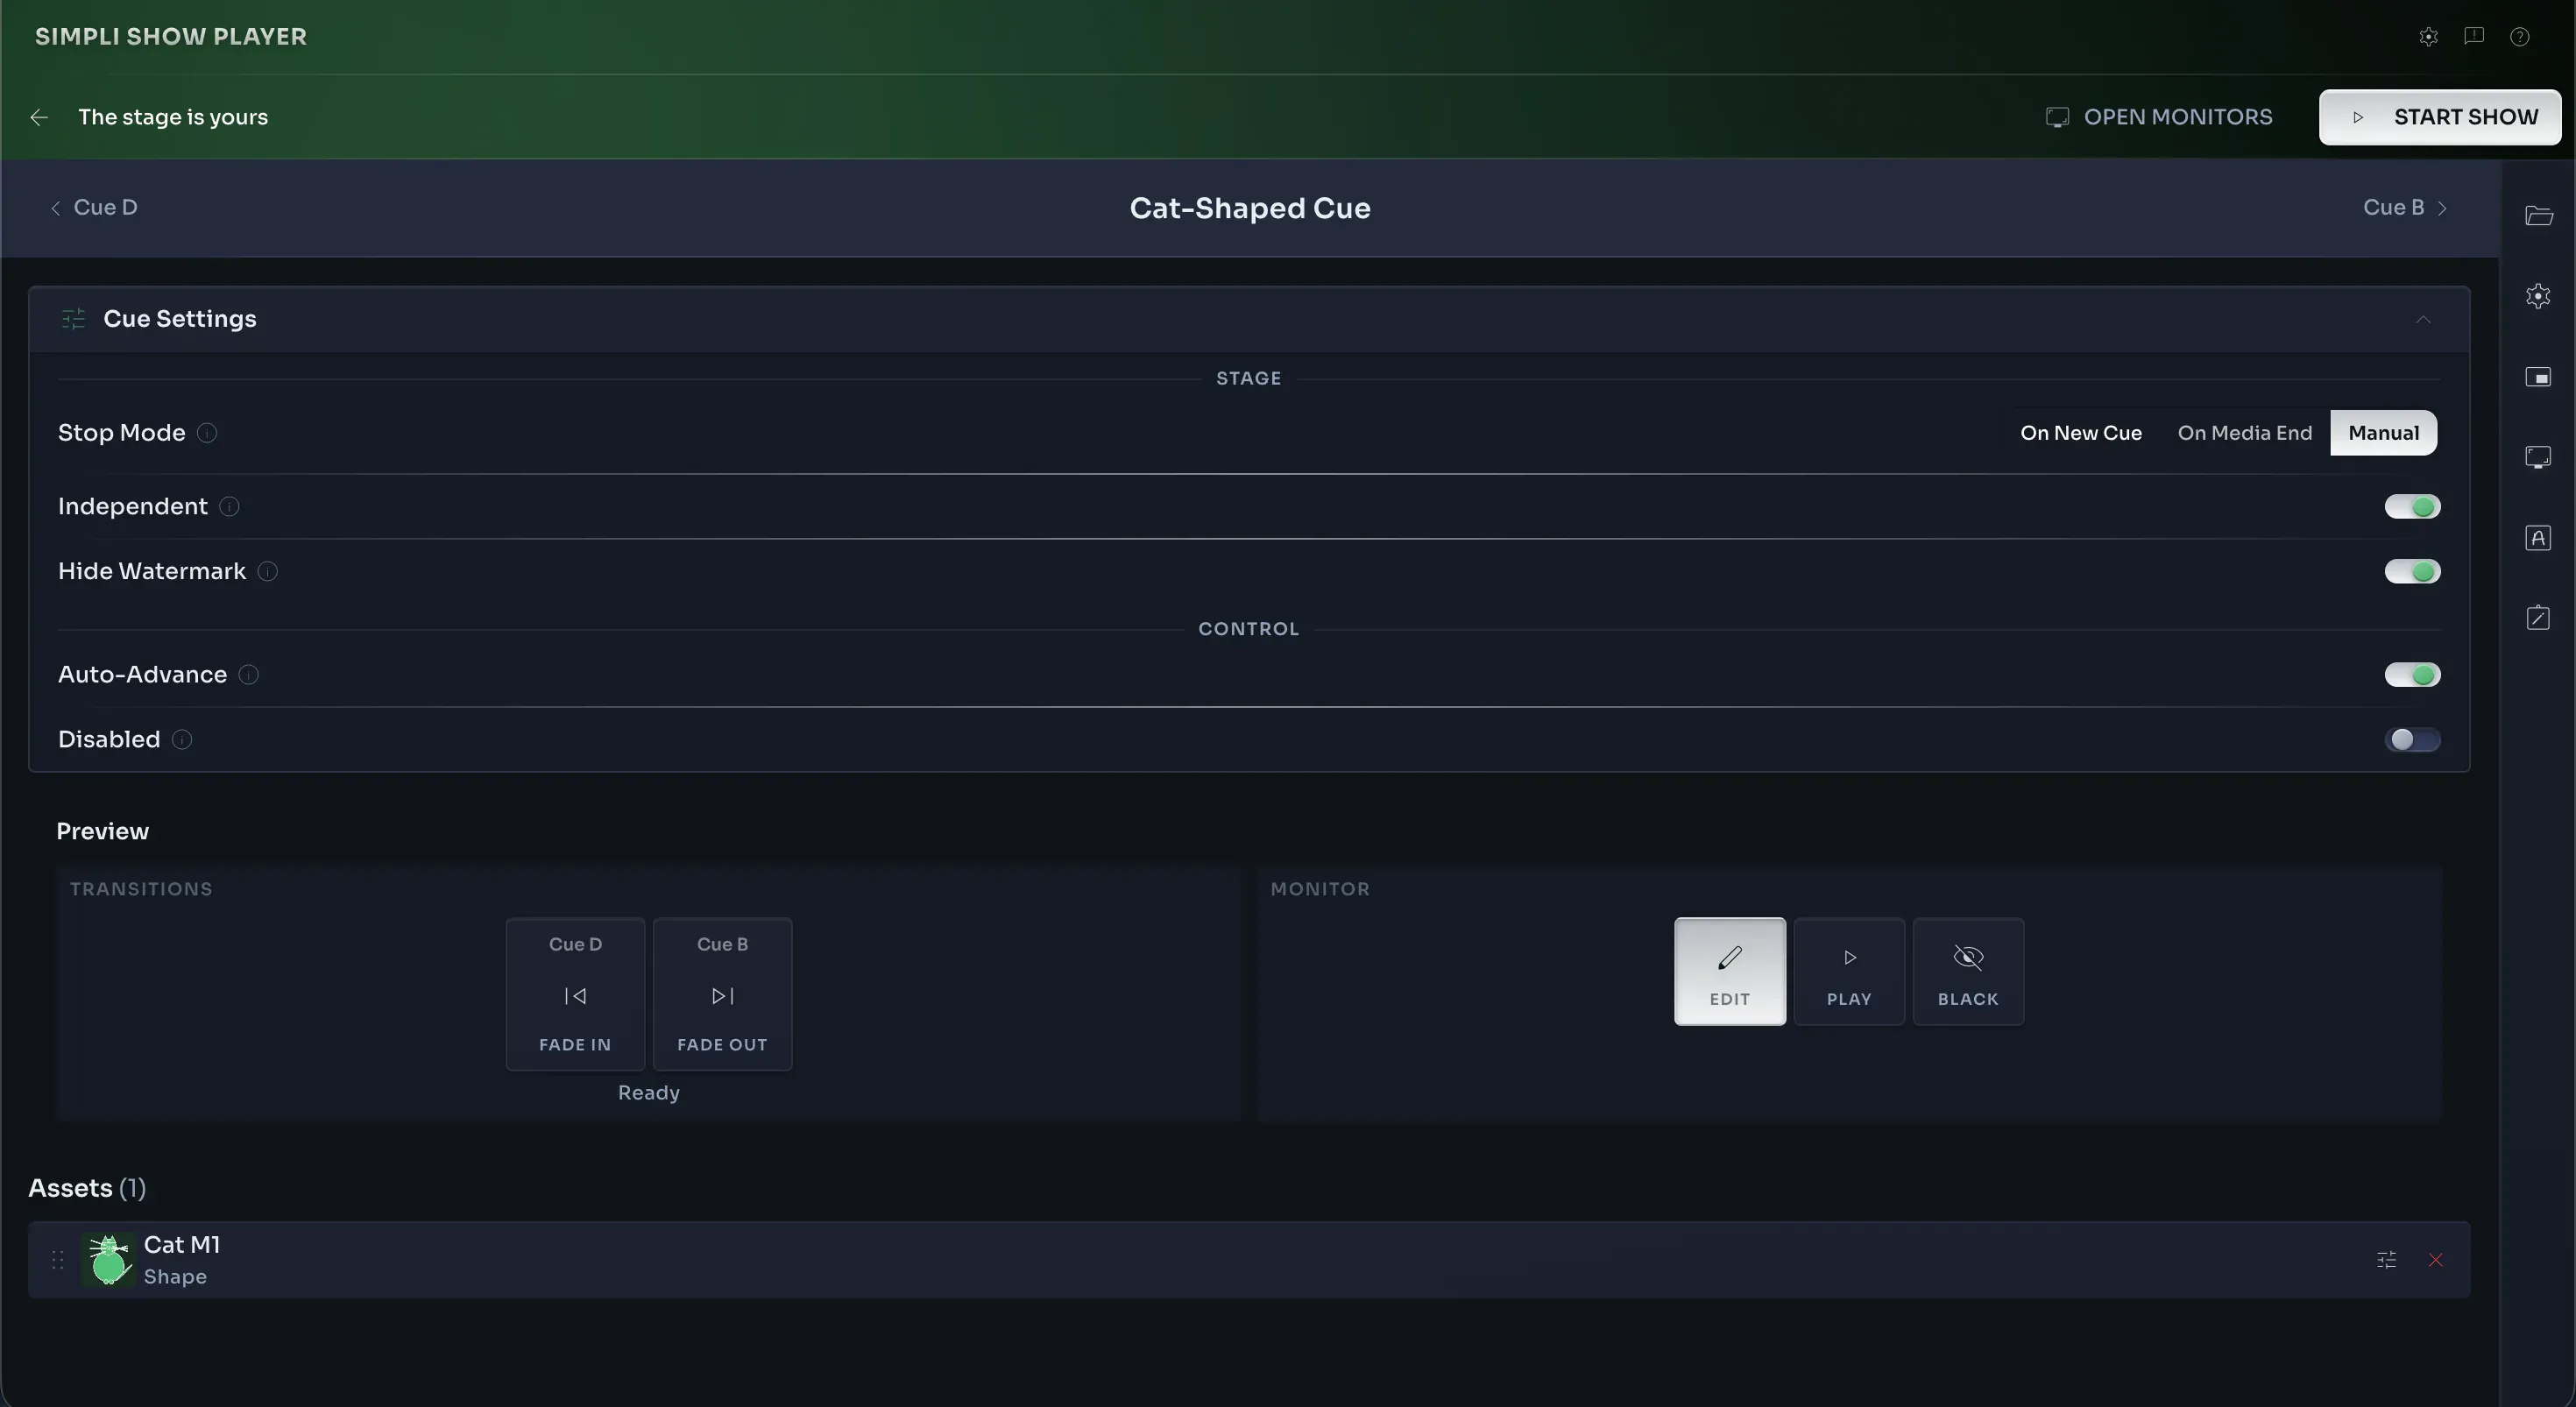
Stop Mode
How should this cue stop? You've got three options:
- Default — The cue stops when another cue starts. Simple and straightforward — this is what you'll use most of the time.
- On Media End — If the cue has videos or sounds (that aren't looped), it stops automatically when the last piece of media finishes playing. Perfect for cues that should run their course and then wrap up on their own.
- Manual — The cue keeps going until you explicitly stop it. This is great for background content — music, ambient visuals, or anything that should stay on stage while other cues come and go.
Other Cue Settings
- Independent — When you trigger an independent cue, it does not stop any other running cues — even those set to stop on new cue. Use this for layering content on top of what's already playing.
- Hide Watermark — Turns off the watermark while this cue is on stage. Useful for clean full-screen moments.
- Auto-Advance — After this cue is triggered, the focus in the control window automatically jumps to the next cue. Comes in handy when you need to fire cues in rapid succession.
- Disabled — A disabled cue is exactly that — it won't play. Keep it around for later, skip it for now.